Creating A Blog Smart Contract On Polygon With Hardhat And Alchemy

I just want to drink coffee and build stuff
This tutorial is a simple and straightforward tutorial aimed at writing and deploying a blogging smart contract to Polygon testnet.
Polygon is a decentralized Ethereum scaling platform that enables developers to build scalable user-friendly dApps with low transaction fees without ever sacrificing on security. It's low transaction fee is the main reason it is preferred over Ethereum especially for beginners in the space.
We would be using Metamask to connect to our contract. If you don't have a Metamask wallet, go to the Metamask website and follow the instructions.
Set Up:
On you computer, open your terminal and make a directory
mkdir blogging-tutorial
Next, change the directory to the new directory
cd blogging-tutorial
Next, initialize
npm init --yes
Then install hardhat
npm install --save-dev hardhat
Then run
npx hardhat
This is what your output will look like
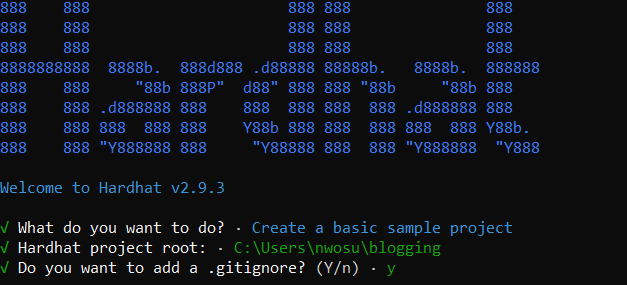
In my case, I have already set up and created the application. But for you, you will have to click enter for every question asked to have your app created.
Select Create a basic sample project
Press enter for the already specified Hardhat Project root
Press enter for the question on if you want to add a .gitignore
Press enter for Do you want to install this sample project's dependencies with npm (@nomiclabs/hardhat-waffle ethereum-waffle chai @nomiclabs/hardhat-ethers ethers)?
It's been created. The next thing is to install your dependencies, the first on the line is the nomic labs
npm install --save-dev @nomiclabs/hardhat-waffle ethereum-waffle chai @nomiclabs/hardhat-ethers ethers
Next in line is the Openzeppelin contract library. This library has helper functions that enables a smooth implementation of these contracts.
npm install @openzeppelin/contracts
The next dependency is the dotenv. This library is what will help conceal your information as you would be making use of your private key from your Metamask wallet and the Alchemy url application.
npm install dotenv
Finally, we would install the etherscan dependency. This would enable us verify our contract after deployment
npm install --save-dev @nomiclabs/hardhat-etherscan
Smart Contract:
In this phase, we would be writing our smart contract for our blog. Our blog will have the following functionalities:
Create a blog post
Modify your blog post
Update your profile
Enable readers tip for their favorite post or writer.
Get number of posts of an author
Get a post by its ID
We would be using Solidity version 0.8.4 and above for this project.
Open your newly created project in your code editor. Click on the contract folder which was created to create a new file - myBlog.sol
Inside this new file is where we would be writing our smart contract.
// SPDX-License-Identifier: MIT
pragma solidity ^0.8.4;

// Token interface
import "@openzeppelin/contracts/token/ERC20/IERC20.sol";
The token interface is to enable readers tip their favorite authors or posts. IERC20 is an interface that defines the ERC20 which is the Ethereum standard of writing smart contract.
First thing we would be doing is to define the token address for the donation. We would be using Matic as the currency of choice - you can use anyother currency/stable coin if you wish.
//Matic deployment address
  address internal maticTokenAddress = 0x7D1AfA7B718fb893dB30A3aBc0Cfc608AaCfeBB0;
Next, we would be creating the structure of our posts and authors.
//Structure for user information
  struct Author {
    string username;
    string bio;
    uint256[] postId;
  }

  //Structure for posts
  struct Post {
    string title;
    string content;
    address writer;
    uint256 created;
  }
In the struct for author, we defined the username and bio as a string and the post ID as an array of unsigned non negative integer. For the post, we defined the title and content as a string, the address of the author and unsigned integer of the creation information.
mapping (address => Author) public authors;
 mapping (uint256 => Post) public posts;
The next step we took was to map address to the author and ID to the posts. A mapping can be seen as a dictionary that enables access to post data as key values.
/**
       * @dev events are signals that are triggred which dispatches information.
       */
  event NewPost(address indexed writer, uint256 postId, string title);

   /**
       * @dev This function creates a new post with unique IDs that are incremental
       * which helps keep track of posts.
       */
  function createPost(string memory title, string memory content) public {
    newPostId++;

    posts[newPostId] = Post(title, content, msg.sender, block.timestamp);
    authors[msg.sender].postId.push(newPostId);

    //Emit declares events that we want to trigger
    emit NewPost(msg.sender, newPostId, title);
  }
We would go back to the top after where we defined our token of choice to add a post id to help us keep track of posts and increment them with time.
The next step is to create an event that dispatches information, create a function that enables the author to create a new post with unique IDs that keeps track of increments and finally emits the events we want triggered.
/**
       * @dev Modify post title function gives the author the ability to
       * edit their post title.
       * We have placed a restriction that allows only the author to edit the post title.
       */
  function modifyPostTitle(uint256 postId, string memory title) public {
    require(msg.sender == posts[postId].writer, "Only the writer can modify title");

    posts[postId].title = title;
  }

   /**
       * @dev Modify post title function gives the author the ability to.
       * edit their post content.
       * We have placed a restriction that allows only the author to edit the post content.
       */
  function modifyPostContent(uint256 postId, string memory content) public {
    require(msg.sender == posts[postId].writer, "Only the writer can modify content");

    posts[postId].content = content;
  }
Next step is to create functions that enables the author to be able to modify their content. The function was split into two - one for the title and another for the contents. We added a restriction to allow only the author of a post to modify it.
/**
       * @dev Update username function is for the author to be able to .
       * modify their username on the site.
       */
  function updateUsername(string memory username) public {
    authors[msg.sender].username = username;
  }

   /**
       * @dev Update bio function is for the author to be able to update.
       * their biography on the site.
       */
  function updateBio(string memory bio) public {
    authors[msg.sender].bio = bio;
  }
Next, we create two functions - one to enable the author/users to update their username and their biography at any given time.
/**
       * @dev Make donation function allows the users to tip/donate to their favorite post/author.
       */
  function makeDonation(uint postId, uint donation) public payable {
    require(IERC20(maticTokenAddress).transferFrom(msg.sender, posts[postId]. writer, donation), "Transfer failed");
  }
The next step is to create a donation function that enables a reader to tip the author/post. This is where the IERC20 comes into play.
/**
       * @dev get post ids by writer function returns with an array of all posts by the same author.
       */
  function getPostIdsByWriter(address writer) public view returns (uint256[] memory) {
    return authors[writer].postId;
  }

   /**
       * @dev get post by id function gets the content of a particular post id.
       */


  function getPostById(uint256 postId) public view returns (string memory title, string memory content) {
    title = posts[postId].title;
    content = posts[postId].content;
  }
}
Next, we created two functions - one to get the array of all posts by the same author and another to get a particular post by its ID.
At the end, this is what our final contract would look like
// SPDX-License-Identifier: MIT
pragma solidity ^0.8.4;

// Token interface
import "@openzeppelin/contracts/token/ERC20/IERC20.sol";

contract Blog {

  //Matic deployment address
  address internal maticTokenAddress = 0x7D1AfA7B718fb893dB30A3aBc0Cfc608AaCfeBB0;

  //Add current post id here
  uint256 public newPostId =0;

  //Structure for user information
  struct Author {
    string username;
    string bio;
    uint256[] postId;
  }

  //Structure for posts
  struct Post {
    string title;
    string content;
    address writer;
    uint256 created;
  }

  //Mapping

  mapping (address => Author) public authors;
  mapping (uint256 => Post) public posts;

   /**
       * @dev events are signals that are triggred which dispatches information.
       */
  event NewPost(address indexed writer, uint256 postId, string title);

   /**
       * @dev This function creates a new post with unique IDs that are incremental
       * which helps keep track of posts.
       */
  function createPost(string memory title, string memory content) public {
    newPostId++;

    posts[newPostId] = Post(title, content, msg.sender, block.timestamp);
    authors[msg.sender].postId.push(newPostId);

    //Emit declares events that we want to trigger
    emit NewPost(msg.sender, newPostId, title);
  }

   /**
       * @dev Modify post title function gives the author the ability to
       * edit their post title.
       * We have placed a restriction that allows only the author to edit the post title.
       */
  function modifyPostTitle(uint256 postId, string memory title) public {
    require(msg.sender == posts[postId].writer, "Only the writer can modify title");

    posts[postId].title = title;
  }

   /**
       * @dev Modify post title function gives the author the ability to.
       * edit their post content.
       * We have placed a restriction that allows only the author to eidt the post content.
       */
  function modifyPostContent(uint256 postId, string memory content) public {
    require(msg.sender == posts[postId].writer, "Only the writer can modify contnet");

    posts[postId].content = content;
  }

   /**
       * @dev Update username function is for the author to be able to .
       * modify their username on the site.
       */
  function updateUsername(string memory username) public {
    authors[msg.sender].username = username;
  }

   /**
       * @dev Update bio function is for the author to be able to update.
       * their biography on the site.
       */
  function updateBio(string memory bio) public {
    authors[msg.sender].bio = bio;
  }

   /**
       * @dev Make donation function allows the users to tip/donate to their favorite post/author.
       */
  function makeDonation(uint postId, uint donation) public payable {
    require(IERC20(maticTokenAddress).transferFrom(msg.sender, posts[postId]. writer, donation), "Transfer failed");
  }

   /**
       * @dev get post ids by writer function returns with an array of all posts by the same author.
       */
  function getPostIdsByWriter(address writer) public view returns (uint256[] memory) {
    return authors[writer].postId;
  }

   /**
       * @dev get post by id function gets the content of a particular post id.
       */
  function getPostById(uint256 postId) public view returns (string memory title, string memory content) {
    title = posts[postId].title;
    content = posts[postId].content;
  }
}
Deployment:
We are done with our smart contract, the next thing we would do is to deploy our smart contract to the Polygon blockchain. Before deployment, make sure you are:
- On matic testnest. If you don't have this network on you wallet, you can add it following the steps highlighted in this website.
You would be adding both mainnet and testnet though we would be working with the testnet. The mainnet will come in handy with time.
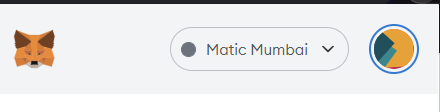
- Be on the matic network. To do this, open your Metamask wallet, click on the dropdown as shown in the attached image, scroll to matic mumbai and select it.
- Have test token. This is known as a faucet which is used for testing purposes. For deploying to mainnet, you would be using real Matic token which costs real money.
To get a faucet, go to the following sites matic supply or polygon technology. There are many more sites to get faucets as they are not limited to these two.
The next step is to set up our Alchemy account. Go to Alchemy, create an account. After it is successful, you would be shown a dashboard. This is where you would be creating your app API.
Click on the create new app
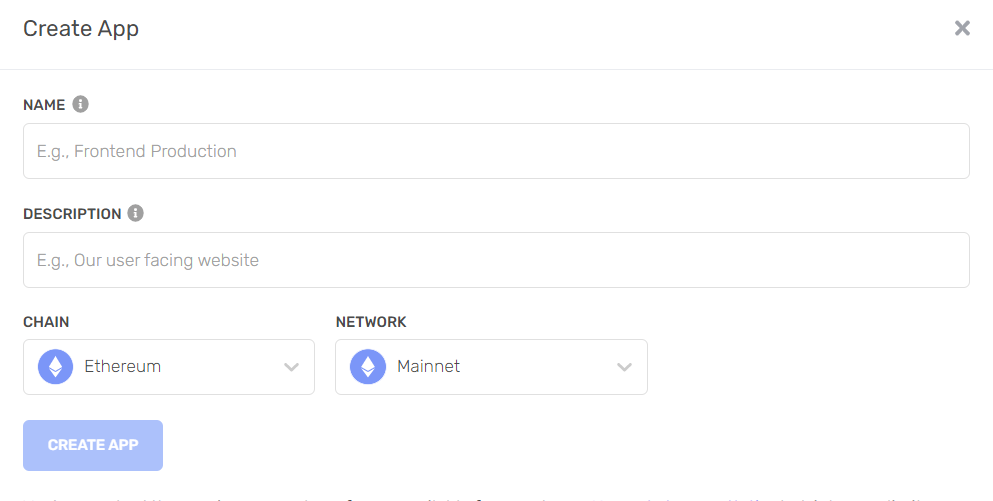
Add the information needed such as the name, description, chain and network. For the chain, choose Polygon, for the network, choose Polygon Mumbai. and click on the create button to create this.
Go back to your code editor, outside your folders and files, create a new file named .env - this is where would house your API url and Polygon private key. This file is not visible when you deploy to your Github profile.
Inside your .env file, add
// Ignore this since we are using the testnet
API_URL="add-the-url-here"

// Go to https://www.alchemyapi.io, sign up, create
// a new App in its dashboard and select the network as Polygon Mumbai, and replace "add-the-alchemy-key-url-here" with its key url
ALCHEMY_API_KEY_URL="add-the-alchemy-key-url-here"

//Go to https://polygonscan.com/, sign up, create a new API key from your dashboard
// and replace "add-the-polygonscan-api-key-here" with its key url
POLYGONSCAN_KEY = "add-the-polygonscan-api-key-here"

// Replace this private key with your RINKEBY account private key
// To export your private key from Metamask, open Metamask and
// go to Account Details > Export Private Key
// Be aware of NEVER putting real Ether into testing accounts
POLYGON_PRIVATE_KEY="add-the-rinkeby-private-key-here"
Then under the scripts folder, create a new file named deploy.js - this is where the instructions for our deployment would be housed.
async function main() {

 const [deployer] = await hre.ethers.getSigners();
 const accountBalance = await deployer.getBalance();

console.log("Deploying contracts with account: ", deployer.address);
console.log("Account balance: ", accountBalance.toString());

const blogContract = await hre.ethers.getContractFactory("Blog");

  // deploy the contract
  const deployedBlogContract = await blogContract.deploy();
  await deployedBlogContract.deployed();

  // print the address of the deployed contract
  console.log(
    "Blog Address:",
    deployedBlogContract.address
  );
}

// Call the main function and catch if there is any error
main()
  .then(() => process.exit(0))
  .catch((error) => {
    console.error(error);
    process.exit(1);
});
Finally, we would modify our hardhat.config file. Inside this file, replace the existing code with this
require("@nomiclabs/hardhat-waffle");
require("@nomiclabs/hardhat-etherscan");
require("dotenv").config({ path: ".env" });

const { API_URL, PRIVATE_KEY, POLYGONSCAN_KEY, ALCHEMY_API_KEY_URL } = process.env;

task("accounts", "Prints the list of accounts", async (taskArgs, hre) => {
  const accounts = await hre.ethers.getSigners();

  for (const account of accounts) {
    console.log(account.address);
  }
});

module.exports = {
  solidity: "0.8.4",
  networks: {
    rinkeby: {
      url: API_URL,
      accounts: [PRIVATE_KEY]
    },
    mumbai: {
      url: ALCHEMY_API_KEY_URL,
      accounts: [PRIVATE_KEY]
    }
  },
  etherscan: {
    apiKey: POLYGONSCAN_KEY
  }
};
Now we are ready to compile and deploy. We would compile our contract to generate the ABI file we would be using in the next tutorial to create the frontend. In the terminal, run
npx hardhat compile

Your output will look similar to this.
Next, we deploy to the testnet
npx hardhat run scripts/deploy.js --network mumbai

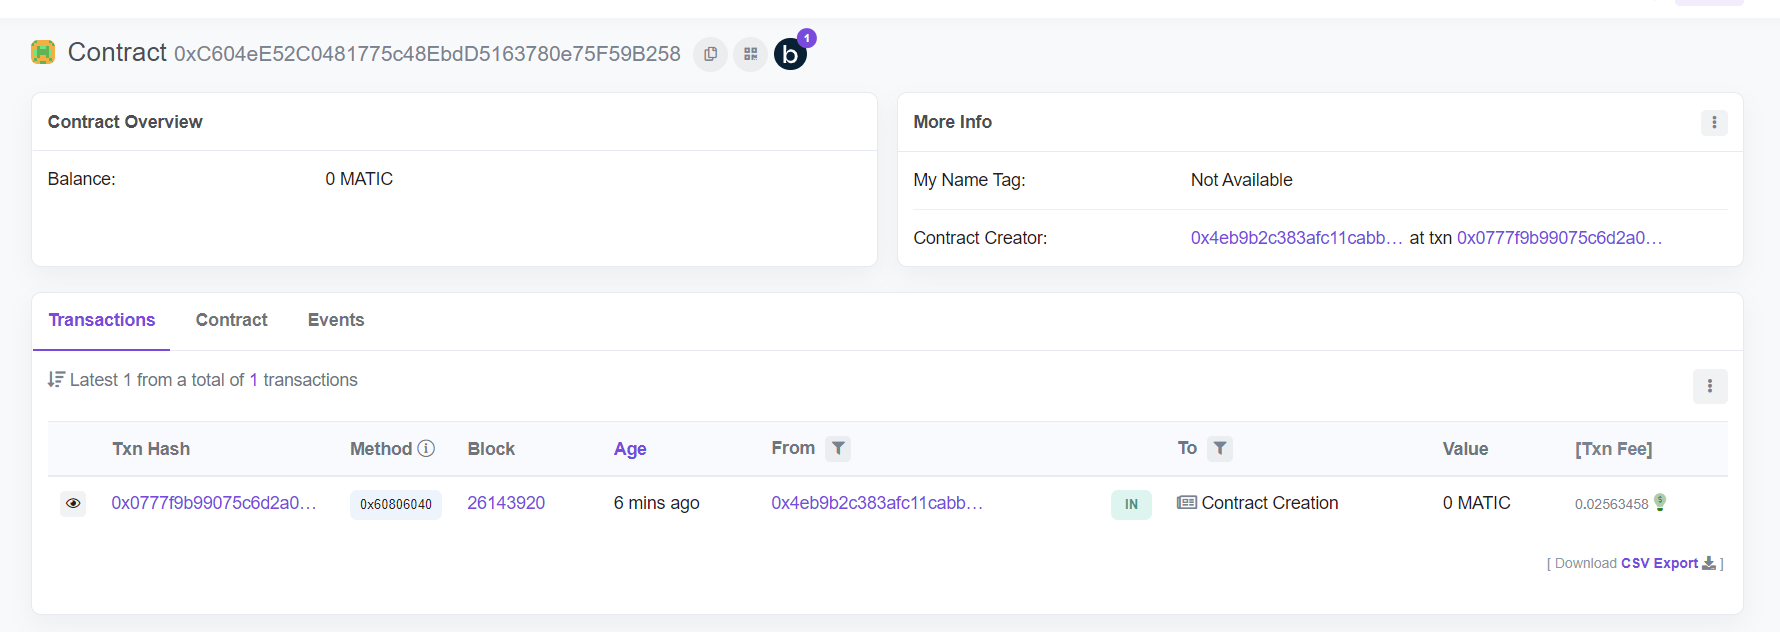
This is what our output will look like. And now our smart contract is live. To verify it on the blockchain, go to Polygonscan mumbai
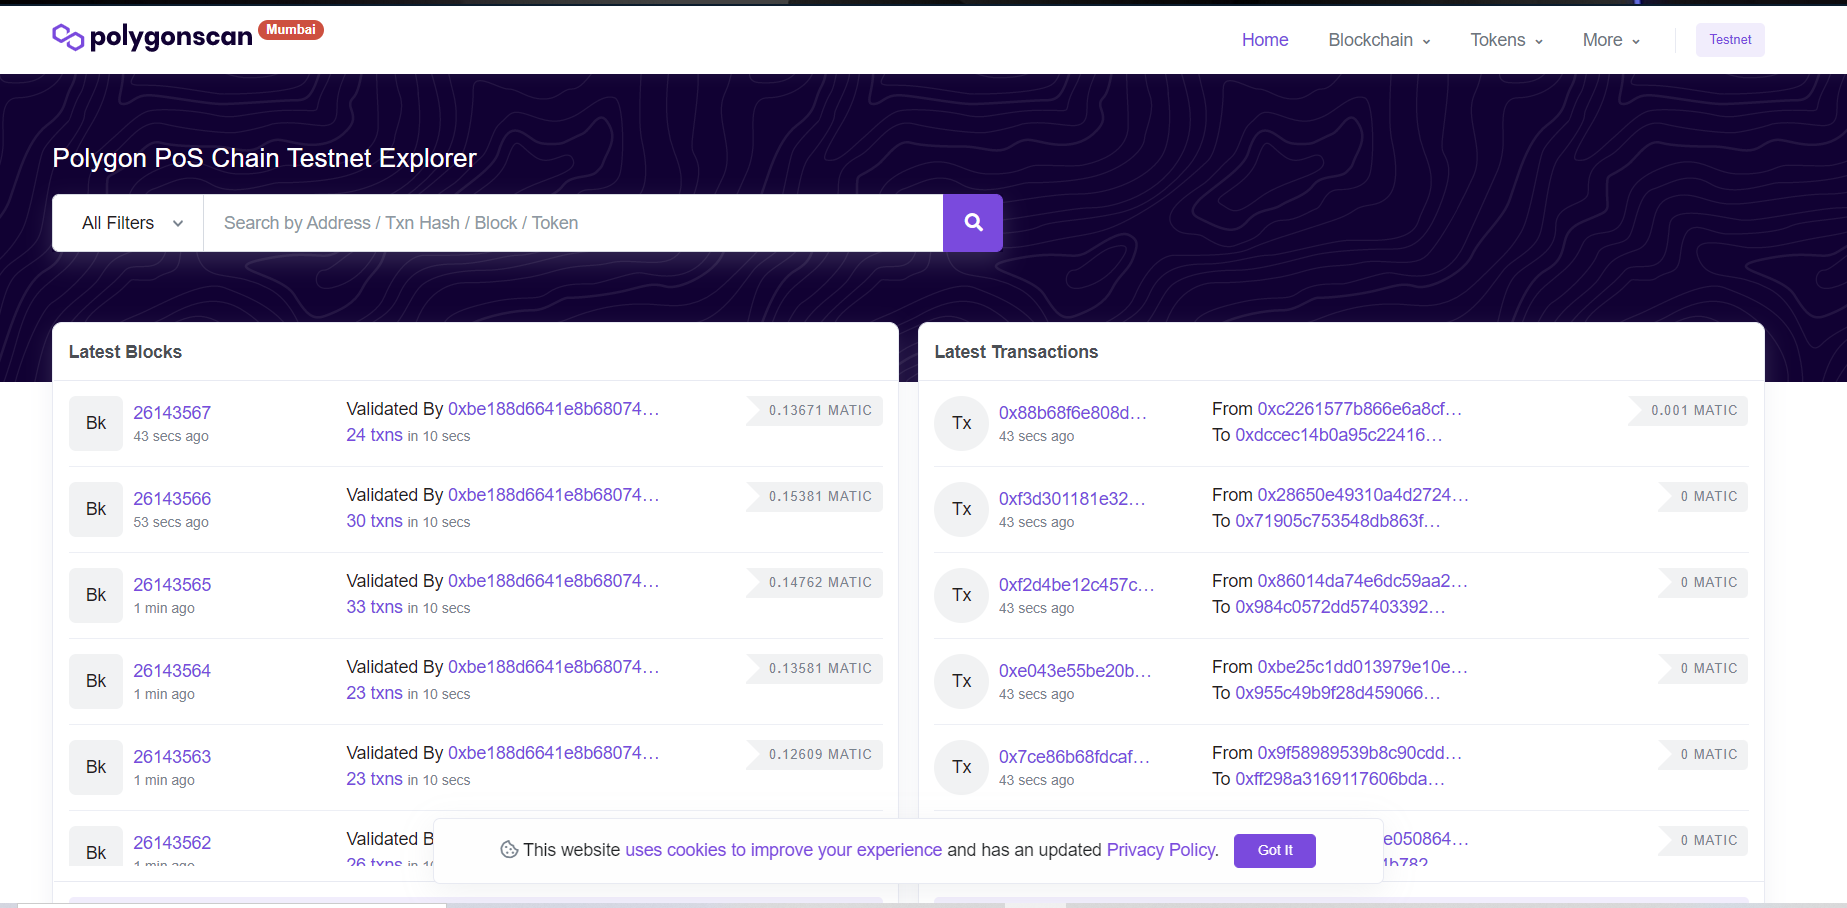
In the search box, type in the contract address that was returned as an output on your terminal. In my case, this is what comes up
Conclusion
You have written your first smart contract and deployed to Polygon testnet. The next tutorial will be handling creating a frontend and connecting it to our smart contract to get a decentralized application.
The repository of this code can be found here and you can connect with me on LinkedIn and Twitter.


